Python + GCP + TradingView で MT4連携システムを構築する完全ガイド
PythonとGoogle Cloud Platform、TradingViewを組み合わせて、MT4との連携システムを構築する方法を詳しく解説します。Firestoreを使った注文管理からWebhookまで。
公開日: 2023-02-19
更新日: 2025-01-29
PythonとGoogle Cloud Platform(GCP)、TradingViewを組み合わせて、MT4との高度な連携システムを構築する方法を解説します。
システム構成
全体アーキテクチャ
TradingView → Webhook → GCP Cloud Functions → Firestore → MT4 EA
データの流れ:
- TradingViewのストラテジーが売買シグナルを生成
- WebhookでGCPのCloud Functionsに送信
- Pythonでリクエストを処理してFirestoreに保存
- MT4のEAがFirestoreから注文情報を取得
- MT4で実際の売買を実行
前提記事
基本的な仮想通貨自動売買については、こちらを先にご確認ください:
GCP環境のセットアップ
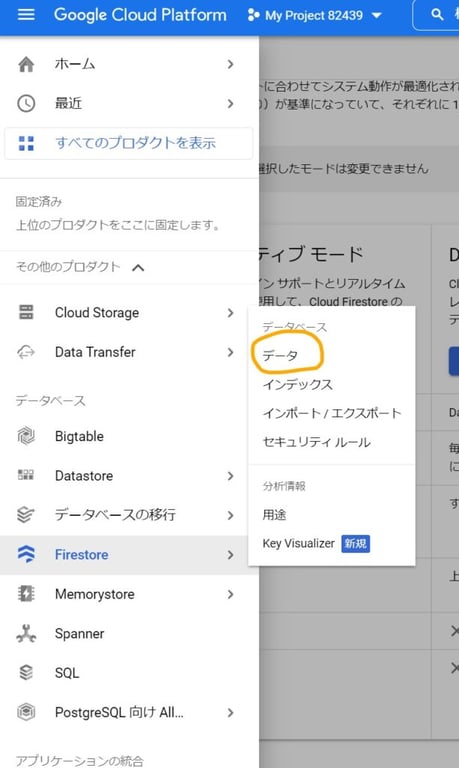
1. Firestoreデータベースの準備
Firestoreとは:
- NoSQLドキュメントデータベース
- リアルタイム同期機能
- 従量課金制で小規模利用は格安
セットアップ手順
- GCPコンソールでFirestoreを選択
- ネイティブモードを選択
- リージョンを設定(asia-southeast1推奨)
2. Cloud Functionsの準備
Cloud Functionsの基本設定:
- Runtime: Python 3.9
- Memory: 256MB
- Timeout: 60秒
- リージョン: asia-southeast1
Python Webアプリの実装
main.py
from google.cloud import firestore
import json

def hello_world(request):
    """
    TradingViewからのWebhook受信とMT4への注文情報提供
    """
    request_json = request.get_json()
    order = ""
    symbol = ""

    # JSONからパラメータ取得
    if request_json and 'order' in request_json:
        order = request_json['order']
    if request_json and 'symbol' in request_json:
        symbol = request_json['symbol']

    if order == "":
        # MT4からの注文情報取得リクエスト
        state = load_order(symbol)
        return {"order": state}
    else:
        # TradingViewからの注文保存リクエスト
        update_order(symbol, order)
        return {"res": "ok"}

def update_order(symbol, order):
    """
    注文情報をFirestoreに保存
    """
    if symbol and order:
        db = firestore.Client()
        doc_ref = db.collection("TradingView").document(symbol)
        doc_ref.set({
            "order": order,
            "timestamp": firestore.SERVER_TIMESTAMP
        })
        print(f"注文保存: {symbol} - {order}")

def load_order(symbol):
    """
    Firestoreから注文情報を取得
    """
    if symbol:
        db = firestore.Client()
        doc = db.collection("TradingView").document(symbol).get()

        if doc.exists:
            data = doc.to_dict()
            return data.get("order", "None")
        else:
            return "None"

    return "None"
requirements.txt
google-cloud-firestore
functions-framework
環境変数の設定
import os
from google.auth import credentials

# サービスアカウントキーの設定
os.environ['GOOGLE_APPLICATION_CREDENTIALS'] = 'path/to/service-account.json'
TradingViewの設定
Pine Script戦略の例
//@version=5
strategy("GCP連携戦略", overlay=true)

// パラメータ
rsi_period = input.int(14, "RSI期間")
rsi_oversold = input.int(30, "RSI買われすぎ")
rsi_overbought = input.int(70, "RSI売られすぎ")

// インジケータ計算
rsi = ta.rsi(close, rsi_period)

// エントリー条件
long_condition = rsi < rsi_oversold
short_condition = rsi > rsi_overbought

// 注文実行
if long_condition
    strategy.entry("Long", strategy.long, comment="buy")

if short_condition
    strategy.entry("Short", strategy.short, comment="sell")

// 決済条件
if strategy.position_size > 0 and rsi > rsi_overbought
    strategy.close("Long", comment="buy_close")

if strategy.position_size < 0 and rsi < rsi_oversold
    strategy.close("Short", comment="sell_close")
Webhookアラートの設定
アラート作成時の設定:
- 条件: ストラテジーの注文実行時
- メッセージフォーマット:
{"symbol":"{{ticker}}", "order":"{{strategy.order.comment}}"}
- Webhook URL: Cloud FunctionsのトリガーURL
- 頻度: Once Per Bar Close
注文コメントの標準化
// 使用する注文コメント
comment = "buy"        // ロングエントリー
comment = "buy_close"  // ロング決済
comment = "sell"       // ショートエントリー
comment = "sell_close" // ショート決済
MT4 EA の実装
基本構造
//+------------------------------------------------------------------+
//| GCP TradingView連携EA                                            |
//+------------------------------------------------------------------+
#property strict

// パラメータ
input string web_hook_url = "https://your-project.cloudfunctions.net/webhook";
input string input_symbol = ""; // 通貨ペア(空白の場合は自動)
input int magic_number = 124455;
input double qty = 0.1; // ロット数
input int input_spread = 30; // スプレッド制限
input int input_slippage = 20; // スリッページ制限
メイン処理
void OnTick() {
    string order = "";
    static datetime prev_time = iTime(NULL, 0, 0);

    // スプレッドチェック
    if(Ask - Bid <= input_spread * _Point) {

        // 1分足の更新時のみ実行
        if(prev_time == iTime(NULL, 0, 0)) {
            return;
        }

        // 秒数制限(サーバー負荷対策)
        if(Seconds() < 2) {
            return;
        }

        prev_time = iTime(NULL, 0, 0);
        order = web_request();
    }

    // ポジション管理
    if(position_count(OP_BUY) > 0) {
        if(order == "buy_close") {
            position_close(OP_BUY);
        }
    }

    if(position_count(OP_SELL) > 0) {
        if(order == "sell_close") {
            position_close(OP_SELL);
        }
    }

    // エントリー処理
    if(order == "buy") {
        position_entry(OP_BUY);
    }
    if(order == "sell") {
        position_entry(OP_SELL);
    }
}
Web リクエスト処理
string web_request() {
    static string prev_state = "";
    string url = web_hook_url;
    string headers;
    string data;
    char post[], result[];

    // 通貨ペア設定
    string symbol = Symbol();
    if(input_symbol != "") {
        symbol = input_symbol;
    }

    // リクエスト作成
    headers = "Content-Type: application/json\r\n";
    data = "{\"symbol\":\"" + symbol + "\"}";

    ArrayResize(post, StringToCharArray(data, post, 0, WHOLE_ARRAY, CP_UTF8) - 1);

    // HTTP POST実行
    int rest = WebRequest("POST", url, headers, 5000, post, result, headers);

    string order = CharArrayToString(result);
    StringReplace(order, "\"", "");

    if(rest != 200) {
        Print(Symbol(), " エラー: ", CharArrayToString(result));
        return "";
    } else {
        // 同じ状態の重複実行防止
        if(prev_state == CharArrayToString(result)) {
            return "";
        }

        if(prev_state == "") {
            prev_state = CharArrayToString(result);
            return "";
        }

        prev_state = CharArrayToString(result);

        if(order == "buy" || order == "buy_close" ||
           order == "sell" || order == "sell_close") {
            Print(Symbol(), " 注文受信: ", CharArrayToString(result));
            return order;
        }
    }

    return "";
}
ポジション管理関数
int position_count(int side) {
    int count = 0;
    for(int i = OrdersTotal() - 1; i >= 0; i--) {
        if(OrderSelect(i, SELECT_BY_POS, MODE_TRADES)) {
            if(OrderType() == side &&
               OrderSymbol() == Symbol() &&
               OrderMagicNumber() == magic_number) {
                count++;
            }
        }
    }
    return count;
}

void position_entry(int side) {
    if(side == OP_BUY) {
        OrderSend(NULL, side, qty, Ask, 0, 0, 0, NULL, magic_number, 0, clrGreen);
    }
    if(side == OP_SELL) {
        OrderSend(NULL, side, qty, Bid, 0, 0, 0, NULL, magic_number, 0, clrRed);
    }
}

void position_close(int side) {
    for(int i = OrdersTotal() - 1; i >= 0; i--) {
        if(OrderSelect(i, SELECT_BY_POS, MODE_TRADES)) {
            if(OrderType() == side &&
               OrderSymbol() == Symbol() &&
               OrderMagicNumber() == magic_number) {
                OrderClose(OrderTicket(), OrderLots(), OrderClosePrice(), 0, clrBlue);
            }
        }
    }
}
セキュリティ対策
1. API認証の実装
import hmac
import hashlib
import base64

def verify_webhook(request):
    """
    Webhook署名検証
    """
    signature = request.headers.get('X-Signature')
    body = request.get_data()

    expected_signature = hmac.new(
        WEBHOOK_SECRET.encode(),
        body,
        hashlib.sha256
    ).hexdigest()

    return hmac.compare_digest(signature, expected_signature)
2. リクエスト制限
from functools import wraps
import time

request_timestamps = {}

def rate_limit(requests_per_minute=10):
    def decorator(func):
        @wraps(func)
        def wrapper(request):
            client_ip = request.environ.get('HTTP_X_FORWARDED_FOR',
                                          request.environ.get('REMOTE_ADDR'))

            current_time = time.time()

            if client_ip in request_timestamps:
                timestamps = request_timestamps[client_ip]
                timestamps = [t for t in timestamps if current_time - t < 60]

                if len(timestamps) >= requests_per_minute:
                    return {"error": "Rate limit exceeded"}, 429

                timestamps.append(current_time)
                request_timestamps[client_ip] = timestamps
            else:
                request_timestamps[client_ip] = [current_time]

            return func(request)
        return wrapper
    return decorator
3. データ検証
def validate_order_data(data):
    """
    注文データの検証
    """
    valid_orders = ["buy", "sell", "buy_close", "sell_close"]
    valid_symbols = ["USDJPY", "EURJPY", "GBPJPY", "BTCUSD"]

    if data.get("order") not in valid_orders:
        return False

    if data.get("symbol") not in valid_symbols:
        return False

    return True
監視・ログ機能
Cloud Functions ログ
import logging
from google.cloud import logging as cloud_logging

# Cloud Logging設定
client = cloud_logging.Client()
client.setup_logging()

def log_trade_event(symbol, order, timestamp):
    """
    取引イベントのログ記録
    """
    logging.info(f"取引実行: {symbol} - {order} at {timestamp}")

    # Firestoreにも記録
    db = firestore.Client()
    doc_ref = db.collection("TradingLogs").document()
    doc_ref.set({
        "symbol": symbol,
        "order": order,
        "timestamp": timestamp,
        "status": "executed"
    })
MT4側のログ
void log_order_event(string action, string symbol, double lots, double price) {
    string log_message = StringFormat(
        "取引実行: %s %s %.2f @ %.5f",
        action, symbol, lots, price
    );

    Print(log_message);

    // ファイルにも記録
    int file_handle = FileOpen("trading_log.txt", FILE_WRITE | FILE_READ | FILE_TXT);
    if(file_handle != INVALID_HANDLE) {
        FileSeek(file_handle, 0, SEEK_END);
        FileWriteString(file_handle, TimeToString(TimeCurrent()) + ": " + log_message + "\n");
        FileClose(file_handle);
    }
}
デプロイと運用
Cloud Functions デプロイ
# GCP CLIでのデプロイ
gcloud functions deploy tradingview-webhook \
  --runtime python39 \
  --trigger-http \
  --allow-unauthenticated \
  --region asia-southeast1 \
  --memory 256MB
MT4設定
-
WebRequestの許可設定
- ツール → オプション → エキスパートアドバイザ
- "WebRequestを許可する"をチェック
- Cloud FunctionsのURLを許可リストに追加
-
EA設定
- web_hook_urlにCloud FunctionsのURL
- 適切なmagic_numberを設定
- spread、slippage制限を調整
トラブルシューティング
よくある問題
1. Webhookが届かない
- TradingViewのアラート設定確認
- Cloud FunctionsのURL確認
- ログでリクエスト受信状況確認
2. MT4で注文が実行されない
- WebRequest許可設定確認
- magic_number重複確認
- spread制限の調整
3. Firestoreへの書き込みエラー
- 認証情報確認
- データ形式確認
- 権限設定確認
デバッグ方法
# Cloud Functions デバッグ
import json

def debug_request(request):
    print(f"Headers: {dict(request.headers)}")
    print(f"Body: {request.get_data()}")
    print(f"JSON: {request.get_json()}")

    return {"debug": "ok"}
まとめ
この連携システムにより、以下が実現できます:
メリット:
- TradingViewの高度な分析機能活用
- クラウドベースの安定稼働
- 複数MT4との同時連携
- リアルタイムでの注文同期
注意点:
- ネットワーク遅延の考慮
- APIクォータの管理
- セキュリティ対策の徹底
- 適切な監視体制の構築
このシステムを基に、さらなる機能拡張や最適化も可能です。安全で効率的な自動売買環境を構築してください。
この記事が役に立ったらシェアしてください
📚 プログラミング・開発 の関連記事
プログラミング・開発
2025/8/31
🚀『もうコード読まなくていい!』AIエージェント開発で激変した開発現場の衝撃体験談
マルチタスク対応AIエージェントが開発現場を根底から変えた。コード読解地獄からの解放、並列開発の圧倒的効率化、そして開発者の疲労激減の生々しい体験を魂込めて語ります。
続きを読むプログラミング・開発
2025/8/31
😎『Claude Code CLI でEA作成マスター』になるための実践的コツと落とし穴回避法
「Claude Code使ってるけどEAがうまく作れない...」そんなあなたへ!2025年最新のCLI操作テクニック、効率的な指示出し方法、よくあるトラブル解決法を実体験ベースで完全解説。初心者でも上級者のようなEAが作れる秘密のコツ教えます。
続きを読むプログラミング・開発
2025/8/31
😭『なんで記事が反映されへんの!?』3時間の格闘から生まれたデプロイシステム完全改良記
「記事書いたのにサイトに出てこない...」そんな地獄から這い上がった、血と汗と涙のデプロイシステム改良プロジェクト。import地獄からfetch天国への道のり、全部見せます。
続きを読む